There are three main books available to learn entrelac knitting. One of the books, "Enjoy Entrelac Knitting" (copyright 1993) is out of print and available for between $45 (used) and $208 (new) online. I'll not include it in this analysis, although it does look like a fine book to learn entrelac knitting.
I would recommend BOTH of these two books as very good books, but let's talk about them. They're both in print and readily available.
First, "Entrelac: The Essential Guide to Interlace Knitting" by Rosemary Drysdale. Retail: $24.95, Sixth & Spring Books, Hardcover, copyright 2010, 160 pages.

Benefit for the Beginner knitter: This book has detailed pictures showing how to knit the basic entrelac pieces.
A lot of the time involved in entrelac is, according to both book authors, wasted in repeated turning of the fabric as it is knit, so they show you how to knit backwards, with detailed instructions and pictures. If you're not interested in freaking yourself out by trying to learn entrelac AT THE SAME TIME as trying to learn to knit backwards, feel free to take one thing at a time. I did, and haven't tackled the knitting backwards thing yet. The important concept that most authors seem to neglect is explaining the concept of "turn." You'll see it in all entrelac patterns. I freaked out, and thought "Geez, I haven't seen this stitch before, which way to turn, what's it mean?"
Actually, it just really means: TURN. Turn the knitting around and go the other way.
There are 25 project patterns in Drysdale's book, most using a variation of the relatively easy stockinette entrelac, often with a special stitch from the included dictionary of more than 65 knitting stitch patterns.
Online reviews of this book are all 4 and 5 star, with one 3 star exception that takes entrelac knitting itself to task rather than the author or the book.
The second book is "Entree to Entrelac Knitting" by Gwen Bortner. From XRX Books, retail $19.95, copyright 2010. Softcover, 160 pages.
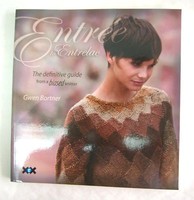
This is the book that, leafing through, made me want to learn entrelac knitting. Gwen Bortner is a big fan of entrelac, and definitely an expert. She has a lot of enthusiasm for entrelac knitting, and conveys much information in this book. It's a very informative book with beautiful patterns.
Bortner's book has a more holistic, mathematical approach. That means if you just skim it you may be intimidated. Pictures and instructions are detailed and well done. As the book progresses, the patterns get more difficult. So again, if you're skimming or looking for a first entrelac project, some of the latter patterns may intimidate. Don't lose heart if you choose this one.
One reviewer likes the way Bortner takes the drape and swing of entrelac patterns into account in the clothing designs. If you're an an advanced knitter and enjoy math and puzzles, you may very well love Bortner's book.
Online book reviews indicate that some people LOVE this book and some people HATE it...so you would probably benefit from reading the reviews to see if it fits your learning style. You know where they would be, the big online bookstore.
One last thought: if you want to give entrelac knitting a try before committing yourself to a $20 purchase for a book, do a search for "free entrelac scarf pattern." You should see the one from Lion Brand. You'll need to register with them and log in, but it's a marvelous source of free patterns. I learned entrelac from this pattern. Do a few sets of squares and entrelac really does become second nature And then either one of these books will take you to the next level.
I would recommend BOTH of these two books as very good books, but let's talk about them. They're both in print and readily available.
First, "Entrelac: The Essential Guide to Interlace Knitting" by Rosemary Drysdale. Retail: $24.95, Sixth & Spring Books, Hardcover, copyright 2010, 160 pages.
Benefit for the Beginner knitter: This book has detailed pictures showing how to knit the basic entrelac pieces.
A lot of the time involved in entrelac is, according to both book authors, wasted in repeated turning of the fabric as it is knit, so they show you how to knit backwards, with detailed instructions and pictures. If you're not interested in freaking yourself out by trying to learn entrelac AT THE SAME TIME as trying to learn to knit backwards, feel free to take one thing at a time. I did, and haven't tackled the knitting backwards thing yet. The important concept that most authors seem to neglect is explaining the concept of "turn." You'll see it in all entrelac patterns. I freaked out, and thought "Geez, I haven't seen this stitch before, which way to turn, what's it mean?"
Actually, it just really means: TURN. Turn the knitting around and go the other way.
There are 25 project patterns in Drysdale's book, most using a variation of the relatively easy stockinette entrelac, often with a special stitch from the included dictionary of more than 65 knitting stitch patterns.
Online reviews of this book are all 4 and 5 star, with one 3 star exception that takes entrelac knitting itself to task rather than the author or the book.
The second book is "Entree to Entrelac Knitting" by Gwen Bortner. From XRX Books, retail $19.95, copyright 2010. Softcover, 160 pages.
This is the book that, leafing through, made me want to learn entrelac knitting. Gwen Bortner is a big fan of entrelac, and definitely an expert. She has a lot of enthusiasm for entrelac knitting, and conveys much information in this book. It's a very informative book with beautiful patterns.
Bortner's book has a more holistic, mathematical approach. That means if you just skim it you may be intimidated. Pictures and instructions are detailed and well done. As the book progresses, the patterns get more difficult. So again, if you're skimming or looking for a first entrelac project, some of the latter patterns may intimidate. Don't lose heart if you choose this one.
One reviewer likes the way Bortner takes the drape and swing of entrelac patterns into account in the clothing designs. If you're an an advanced knitter and enjoy math and puzzles, you may very well love Bortner's book.
Online book reviews indicate that some people LOVE this book and some people HATE it...so you would probably benefit from reading the reviews to see if it fits your learning style. You know where they would be, the big online bookstore.
One last thought: if you want to give entrelac knitting a try before committing yourself to a $20 purchase for a book, do a search for "free entrelac scarf pattern." You should see the one from Lion Brand. You'll need to register with them and log in, but it's a marvelous source of free patterns. I learned entrelac from this pattern. Do a few sets of squares and entrelac really does become second nature And then either one of these books will take you to the next level.


